Capture One with Hasselblad: Was it worth the wait?
Test Case: Folly Beach, South Carolina
Capture One users, like myself, have long begged for support of Hasselblad .3FR files natively in the app. On July 2, 2026, Hasselblad and Capture One announced native RAW support. I dived in to find out if it was worth the wait!
My goal here is to report how well .3FR files import from the X2Dii and then how well Capture One assigns lens adjustments and renders the files. Then I am going to discuss the pro’s and con’s of both Capture One and Phocus so you can better assess how you might like to proceed. As a quick note, I am not affiliated with either Capture One or Hasselblad, so these are all my own personal opinions and I do not receive anything for providing them.
Probably like many of you reading this, I have been using Capture One for a long time. I switched from Adobe Lightroom about 7 years ago. However, as I broke into the digital Hasselblad arena in 2023, I was stuck using Phocus for my edits and exports. Yes, there are some complicated workarounds to get into Capture One, but those were not for me. After spending the last 3 years comparing the Hasselblad X2D and CFV systems to the Leica S system, the one commonality is that high-quality medium format systems can produce incredible results! With their past few releases, Phocus has finally produced a very good editing solution, and the Phocus 2 for Mobile has been an outstanding travel editing platform, adding some features not available on the computer version.
You can probably imagine how excited I was to find out the partnership with Hasselblad and Capture One was real! After reading the news, I quickly grabbed my Macbook and my iPad, downloading the new versions that were now Hasselblad ready. For this review, I am sticking with Capture One and Phocus for the Mac.
Importing Files
Importing files is the same as it is for other camera systems. I did not try the USB-C cable directly to the camera, but I also believe in backups, so all my images are stored on both the internal SSD and the CFexpress Type B card. So, I simply put the CFE card in the reader while Capture One was open. Clicking on the large Import button on the toolbar, I navigated to my image directory. On my card, that was in the DCIM directory and 106HASBL. Yours should be similar.
All the images popped up in the browse view fairly quickly, and I could select all the .3FR files and set my naming and storage parameters ending with clicking “Import.” The files are large, most over 212 megabytes. The speed for importing seemed to be the same as when I copy them for use in Phocus. That seems to be more dependent on the memory card and computer interfaces than anything else.
Capture One went through the import flawlessly and then brought up the familiar group view while it processed the previews. Then I was ready to peek under the hood. I had previously imported these files into Phocus and used two different directories so I would be sure that no changes in one program could affect changes in the other. I would not do this as a regular production workflow because it wastes too much space.
First View and Comparison Out-of-Camera
Another important note here is that I was using my 2-week-old BenQ SW272U/B monitor. I have long used BenQ monitors and they do a tremendous job of capturing just about all of the Adobe RGB workspace and a good bit of the P3 workspace, holding calibrations for several weeks very well. If you do not calibrate your monitor regularly, then I would recommend you take a look at that process! Because of the calibrated monitor I am able to accurately see the differences in color between Capture One and Phocus.
The first comparison I did was to take an image and simply compare them side by side in the both programs with no edits, only software import adjustments. For Capture One, this means setting the camera type and lens model so that the RAW file could be properly processed and set up for editing. I have customized my Capture One interface significantly for my workflow, so I went into the area with the base characteristics and lens corrections. Capture One correctly identified my camera body, selecting the Auto curve. The lens was properly listed with both the Chomatic Aberration and Hide Distorted Areas checked, moving the Distortion and Light Falloff sliders to 100. Diffraction Correction remained unchecked. This is standard behavior for Capture One, and I was glad to see it was automated for the Hasselblad system.
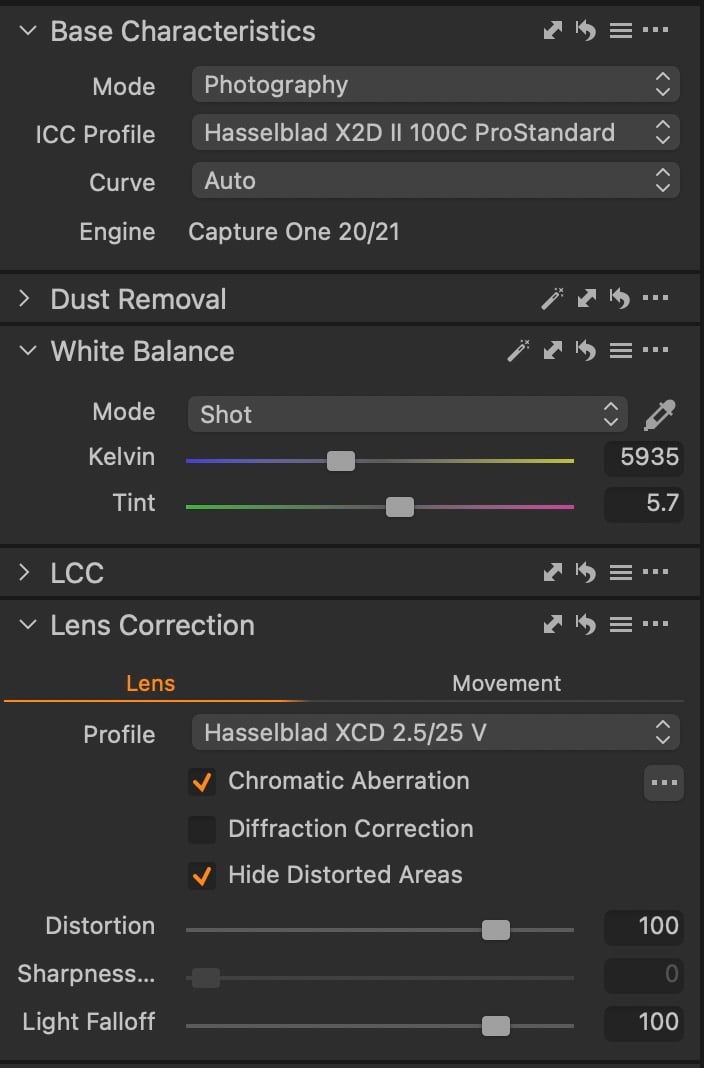
Capture One has said specifically in their release that the three 100 megapixel camera sensors are supported for now, including the X2D, the X2D ii and the CFV 100c. They indicated tethering will come later in 2026. It isn’t yet clear if older 50 megapixel sensors will be added or only new products going forward. If you look at the list of cameras in the 16.8.3.14 release, only the X2D and X2D ii are listed. Presumably the CFV 100c will come in the next release. However, the list of lenses includes some old CF lenses for the 500 series bodies, HC lenses and XCD lenses both older and newer varieties.
All these images (except 1) were taken on July 1st and 2nd at Folly Beach in South Carolina with the X2D ii. I exported them as JPEGs using the Adobe RGB color space and sized for 2048 on the long edge to minimize differences between software. Due to the smaller color space, some color nuances may not be evident in the images here. I’ll describe the differences I could see on my monitor using the full 16-bit color engines in the software to help you decide in which program you want to edit your Hasselblad images.
The first comparison is a sand fence with flowers just outside by the public parking. It is very hard to see differences between these renderings with all the activity and colors in the scene. We will see in a minute how large areas of similar colors will show some differences. These images received no edits.
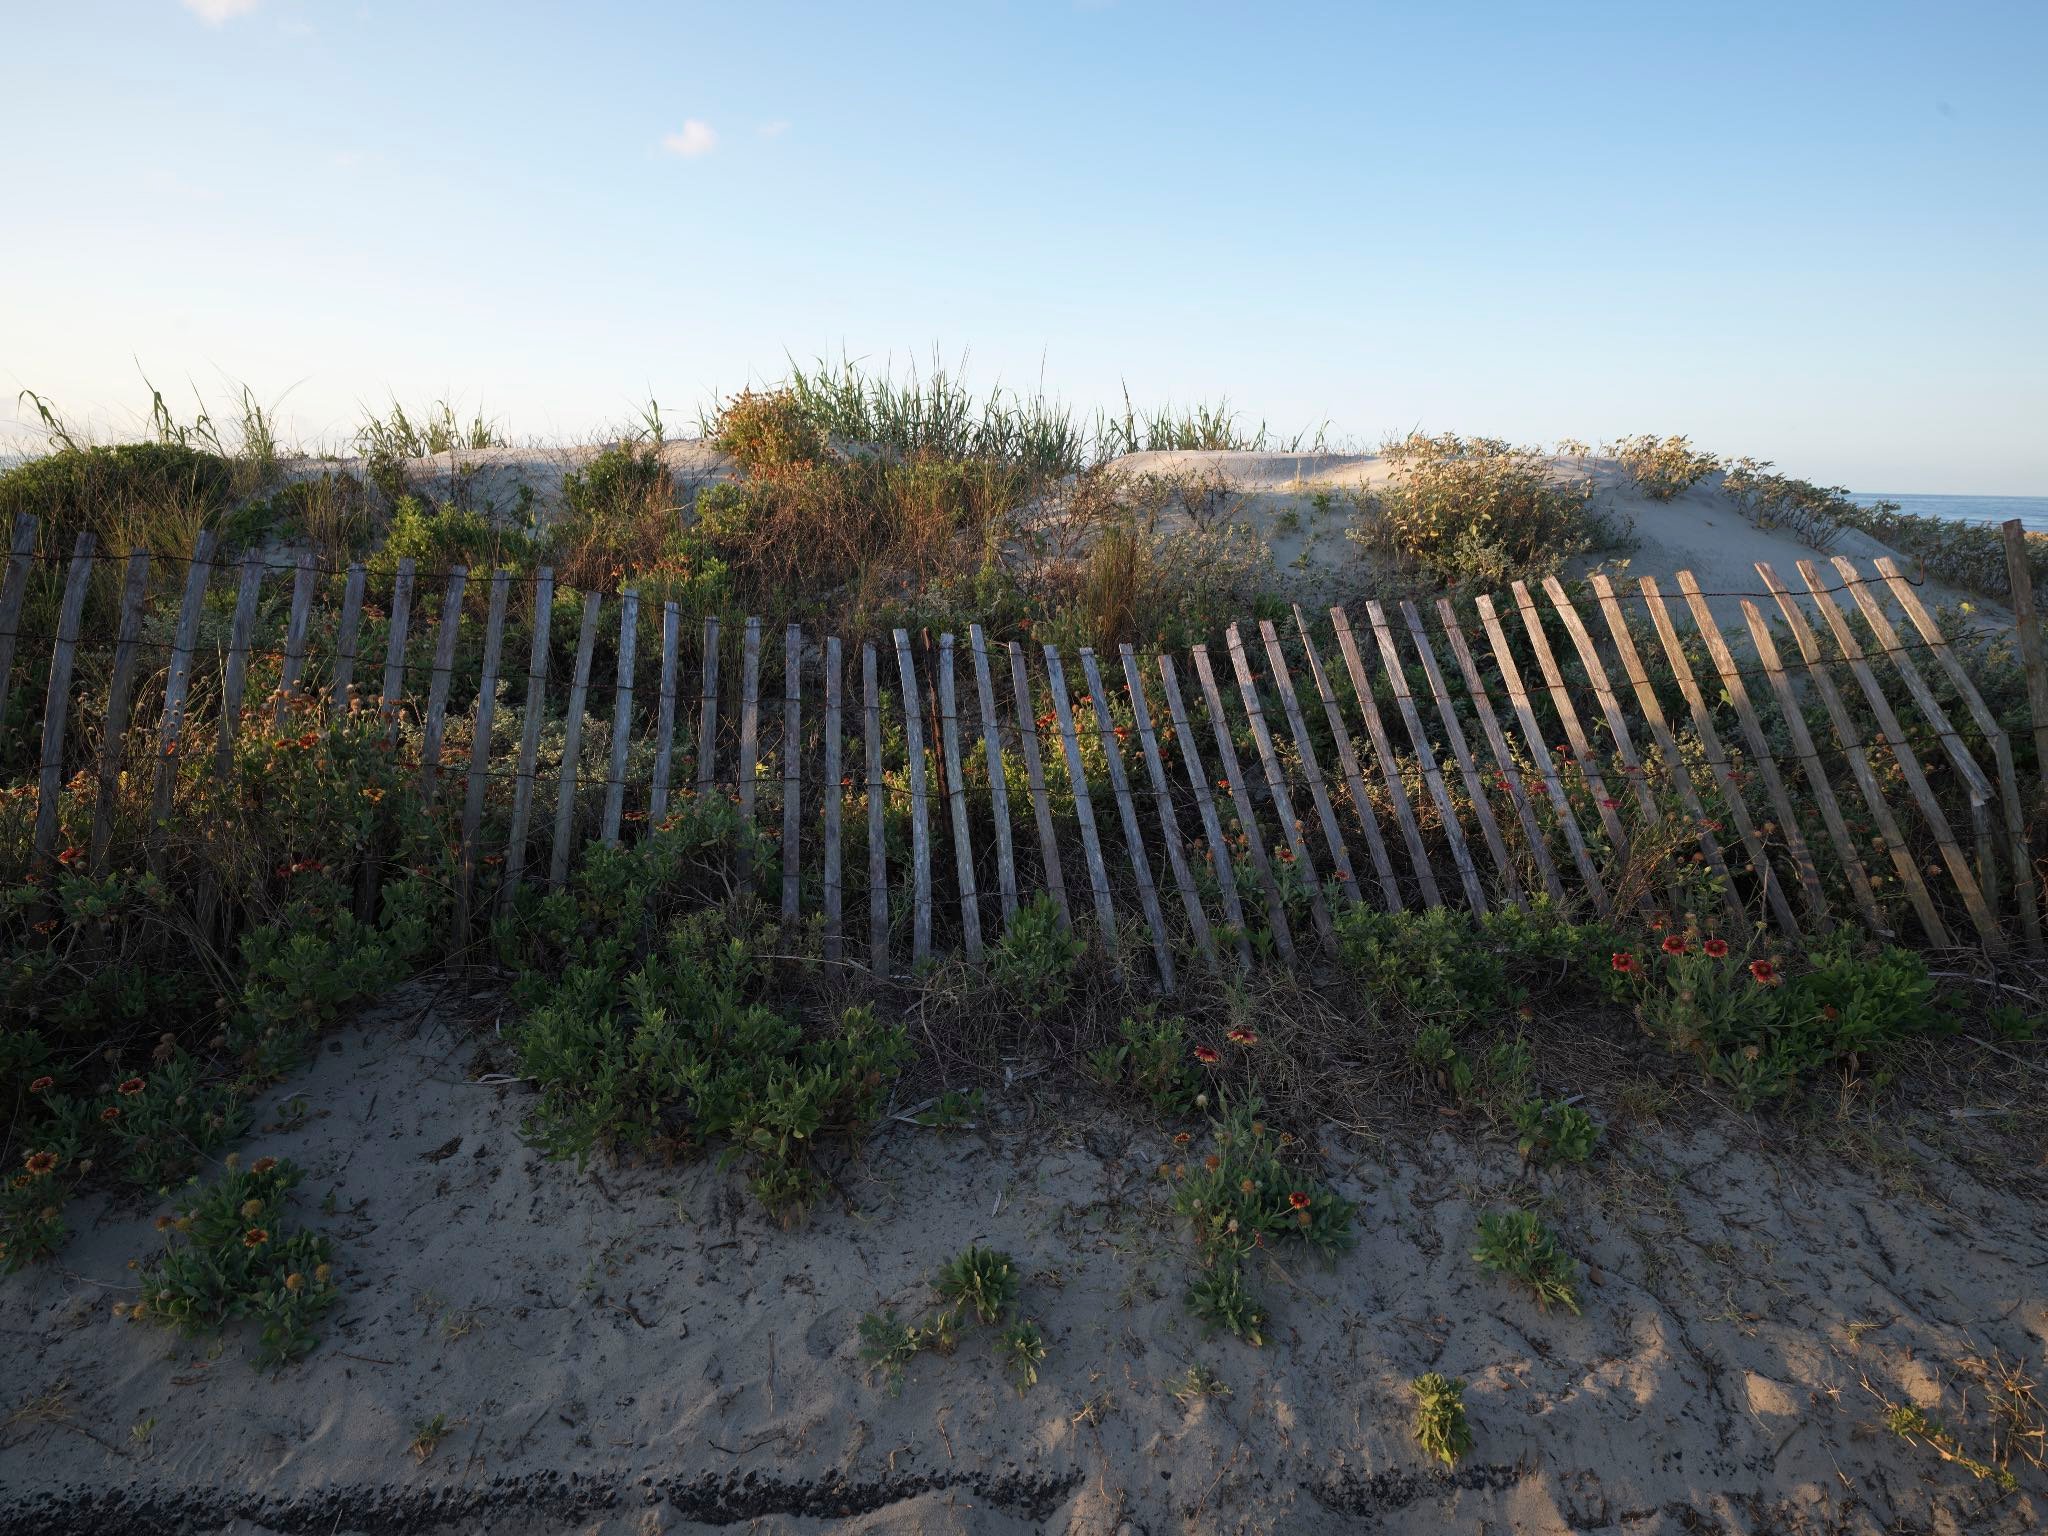
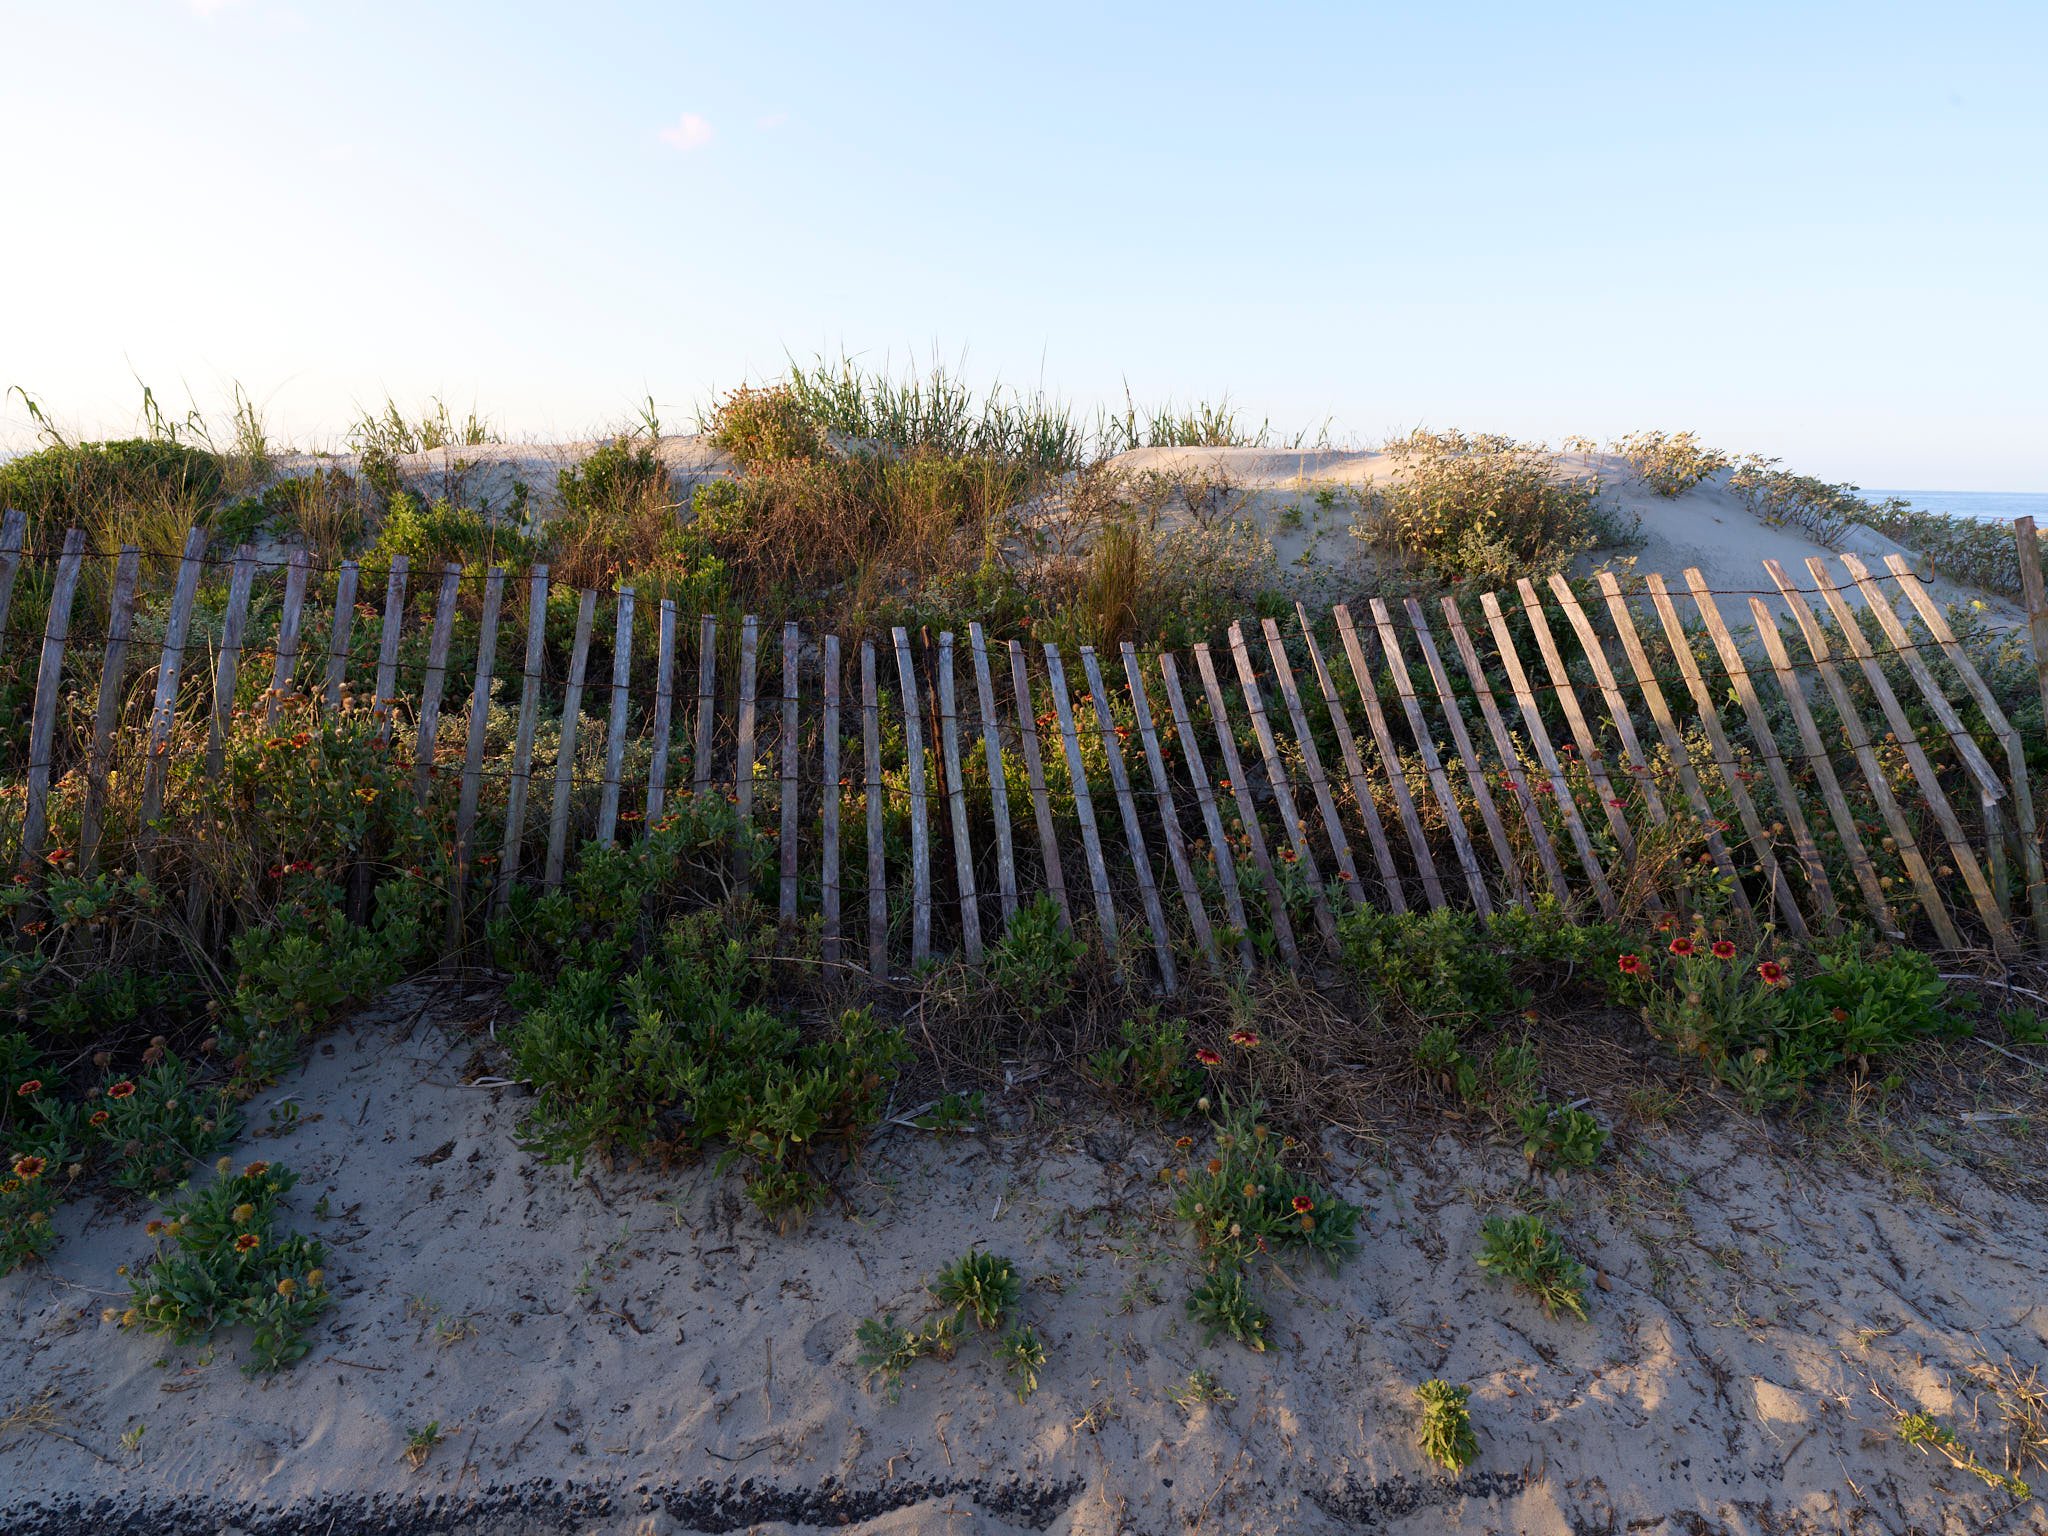
I did note while exporting these images that the histograms between Capture One and Phocus are very different. I expect it is related to how the program uses the RAW data. See below where the Phocus histogram shows a very high blue spike in the highlights from the sky and also a spike at the end of the shadows. Overall, the Capture One histogram looks much smoother. Whether that is a result of how the program shows the RAW file or some other processing method underneath, the resulting images still look very similar. I ultimately decided to disregard the difference as the edited image is the most important.
Color Space Renditions & Edits
This next group of images I edited in each program independently before exporting. I did not try to modify any colors but only use Exposure sliders, HDR sliders and luminosity curves, with some clarity and structure thrown in. The point was not to try and make the images look the same, but see how I would edit the images given how the software works with the files. This allows me to see more clearly any differences in how the RAW files behave in both Capture One and Phocus.
This first image was standing on a rock groin as the tide was moving in. It was right at sunset, so the colors were off in the distance and without cloud cover, the sky provided a great way to see how the gradients were processed. I was using the 38v for this particular evening and used the stabilization of the X2Dii to keep shooting at ISO 50 and 0.7 seconds without a tripod. The Phocus processed image has some beautiful blues in the ocean and yellow reflected from the evening sky. It is what I always expect out of the Phocus app.
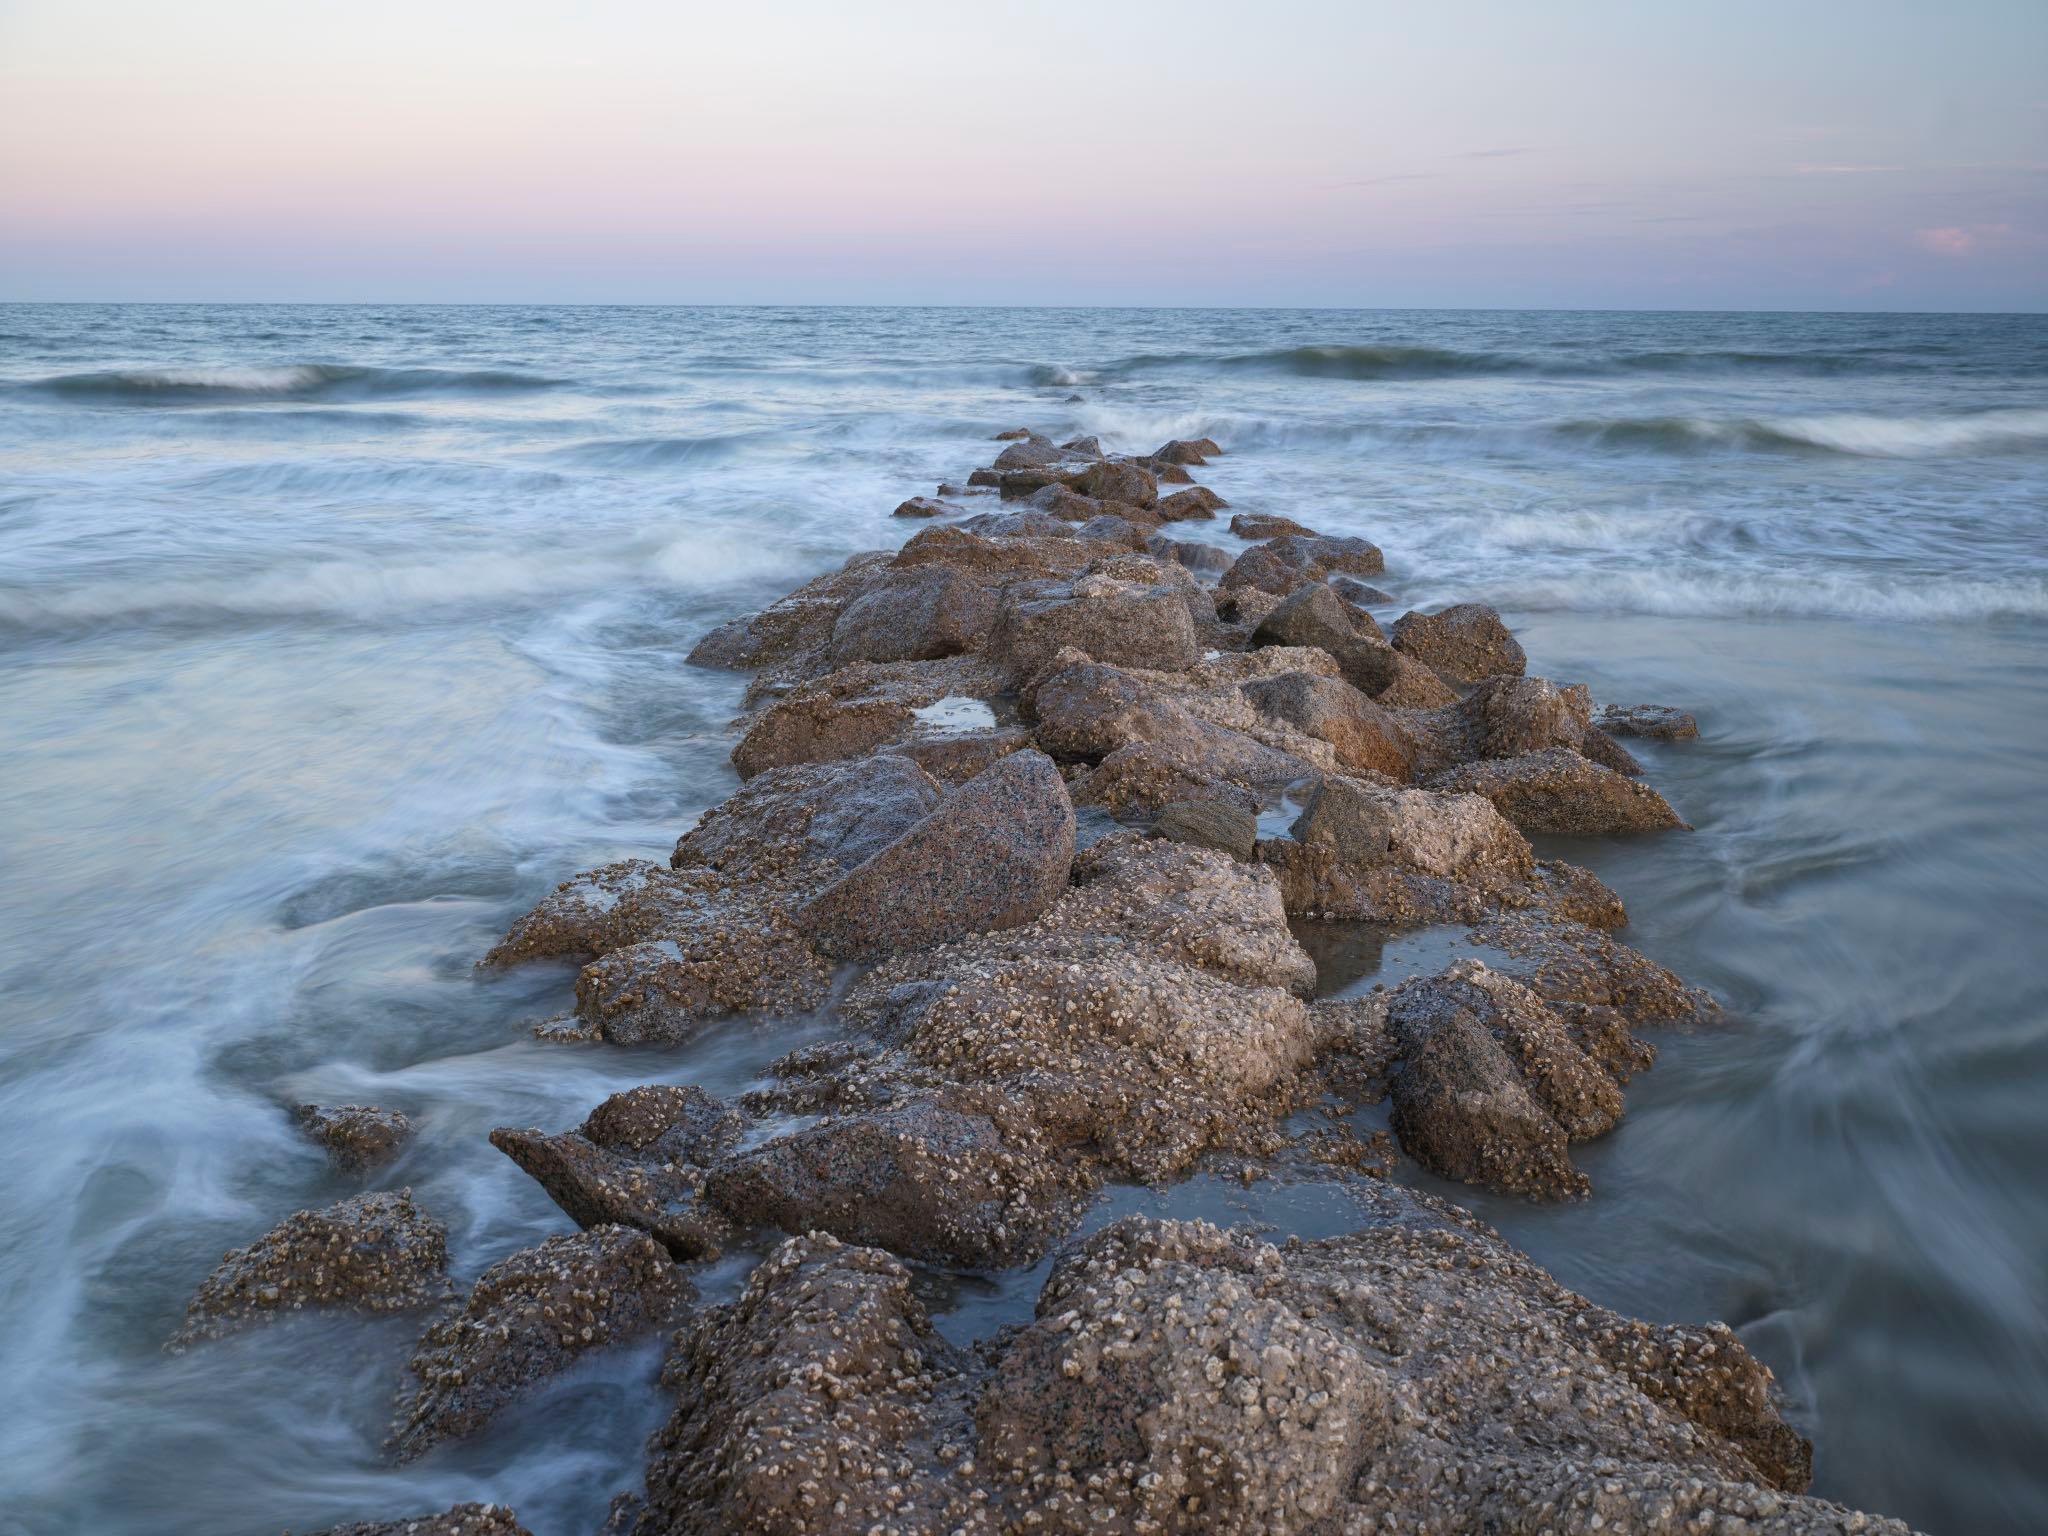
The same image processed in Capture One shows a different set of hues. The blue is a little less bright, but not by much. The problem shows up in the sky and the highlights in parts of the ocean. The Capture One image seems to lean much more towards purple.

The second image is directly behind me on the groin. The tide was coming in every other wave or so. It would cover the rocks that were partially submerged in sand and give off this great reflection of the bright cloudless sky. The Phocus image has a clearly natural representation of all the sand and rock tones. Again, what I would expect.
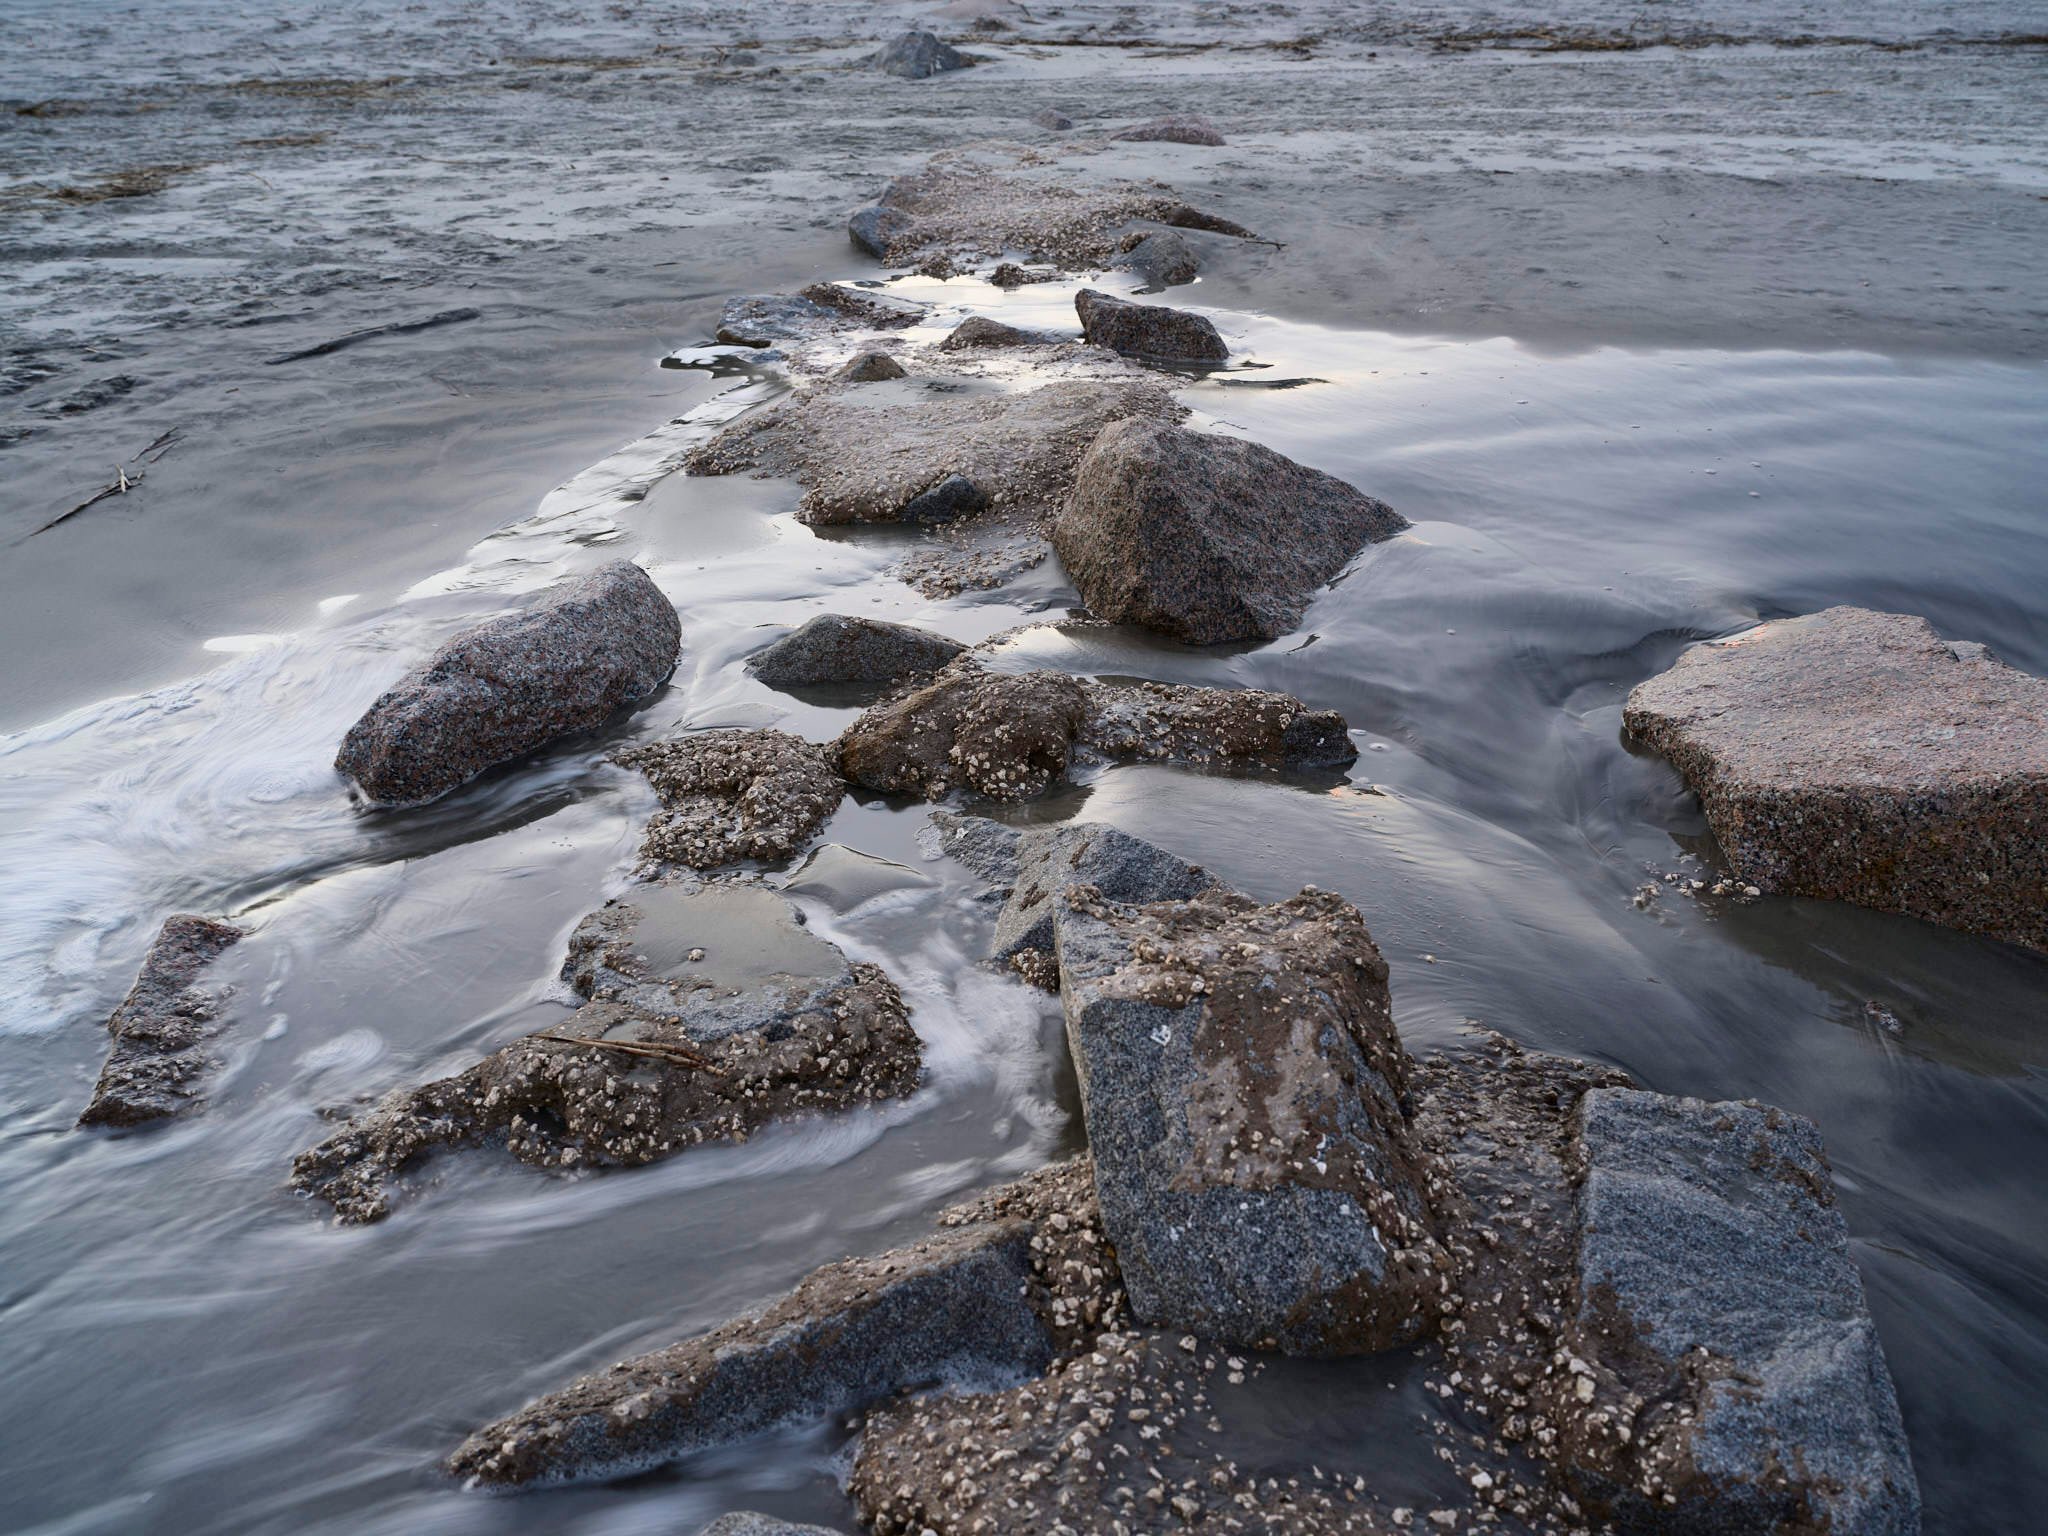
When I look at the Capture One result, it also seems to have a natural tone and the nuances of the water on the sand look terrific. However, when I put the two images side by side, I can clearly see a purple tinge towards the Capture One image. This was especially evident when I opened both images in Preview after exporting them and simply clicked back and forth between them.
Correcting the Purple
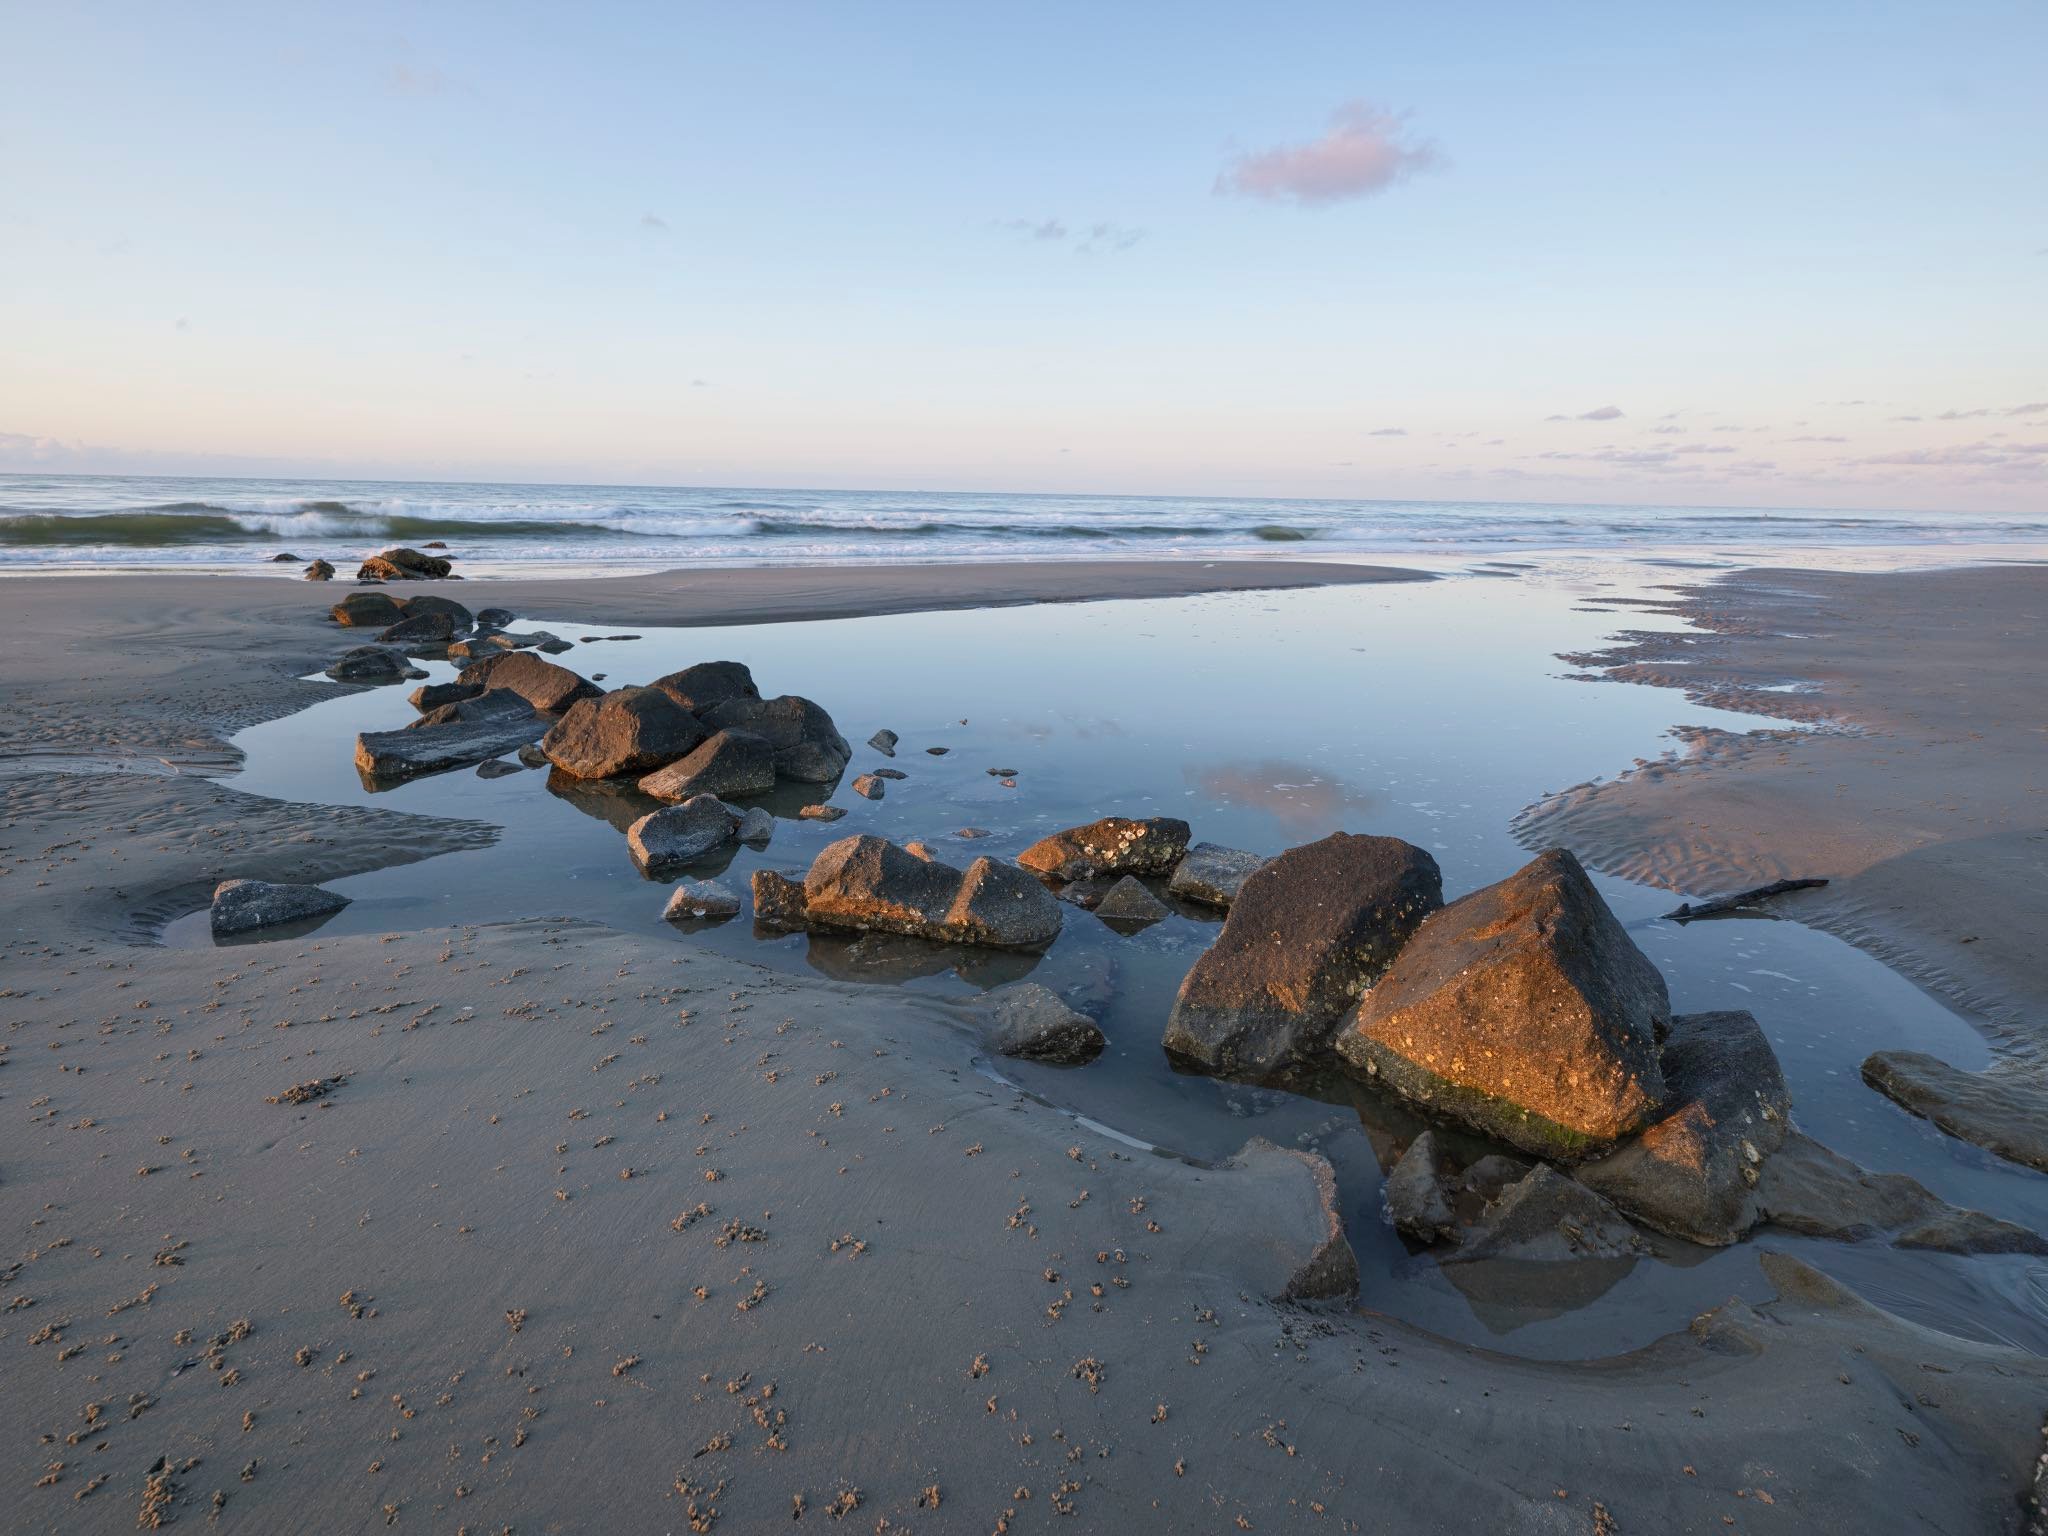
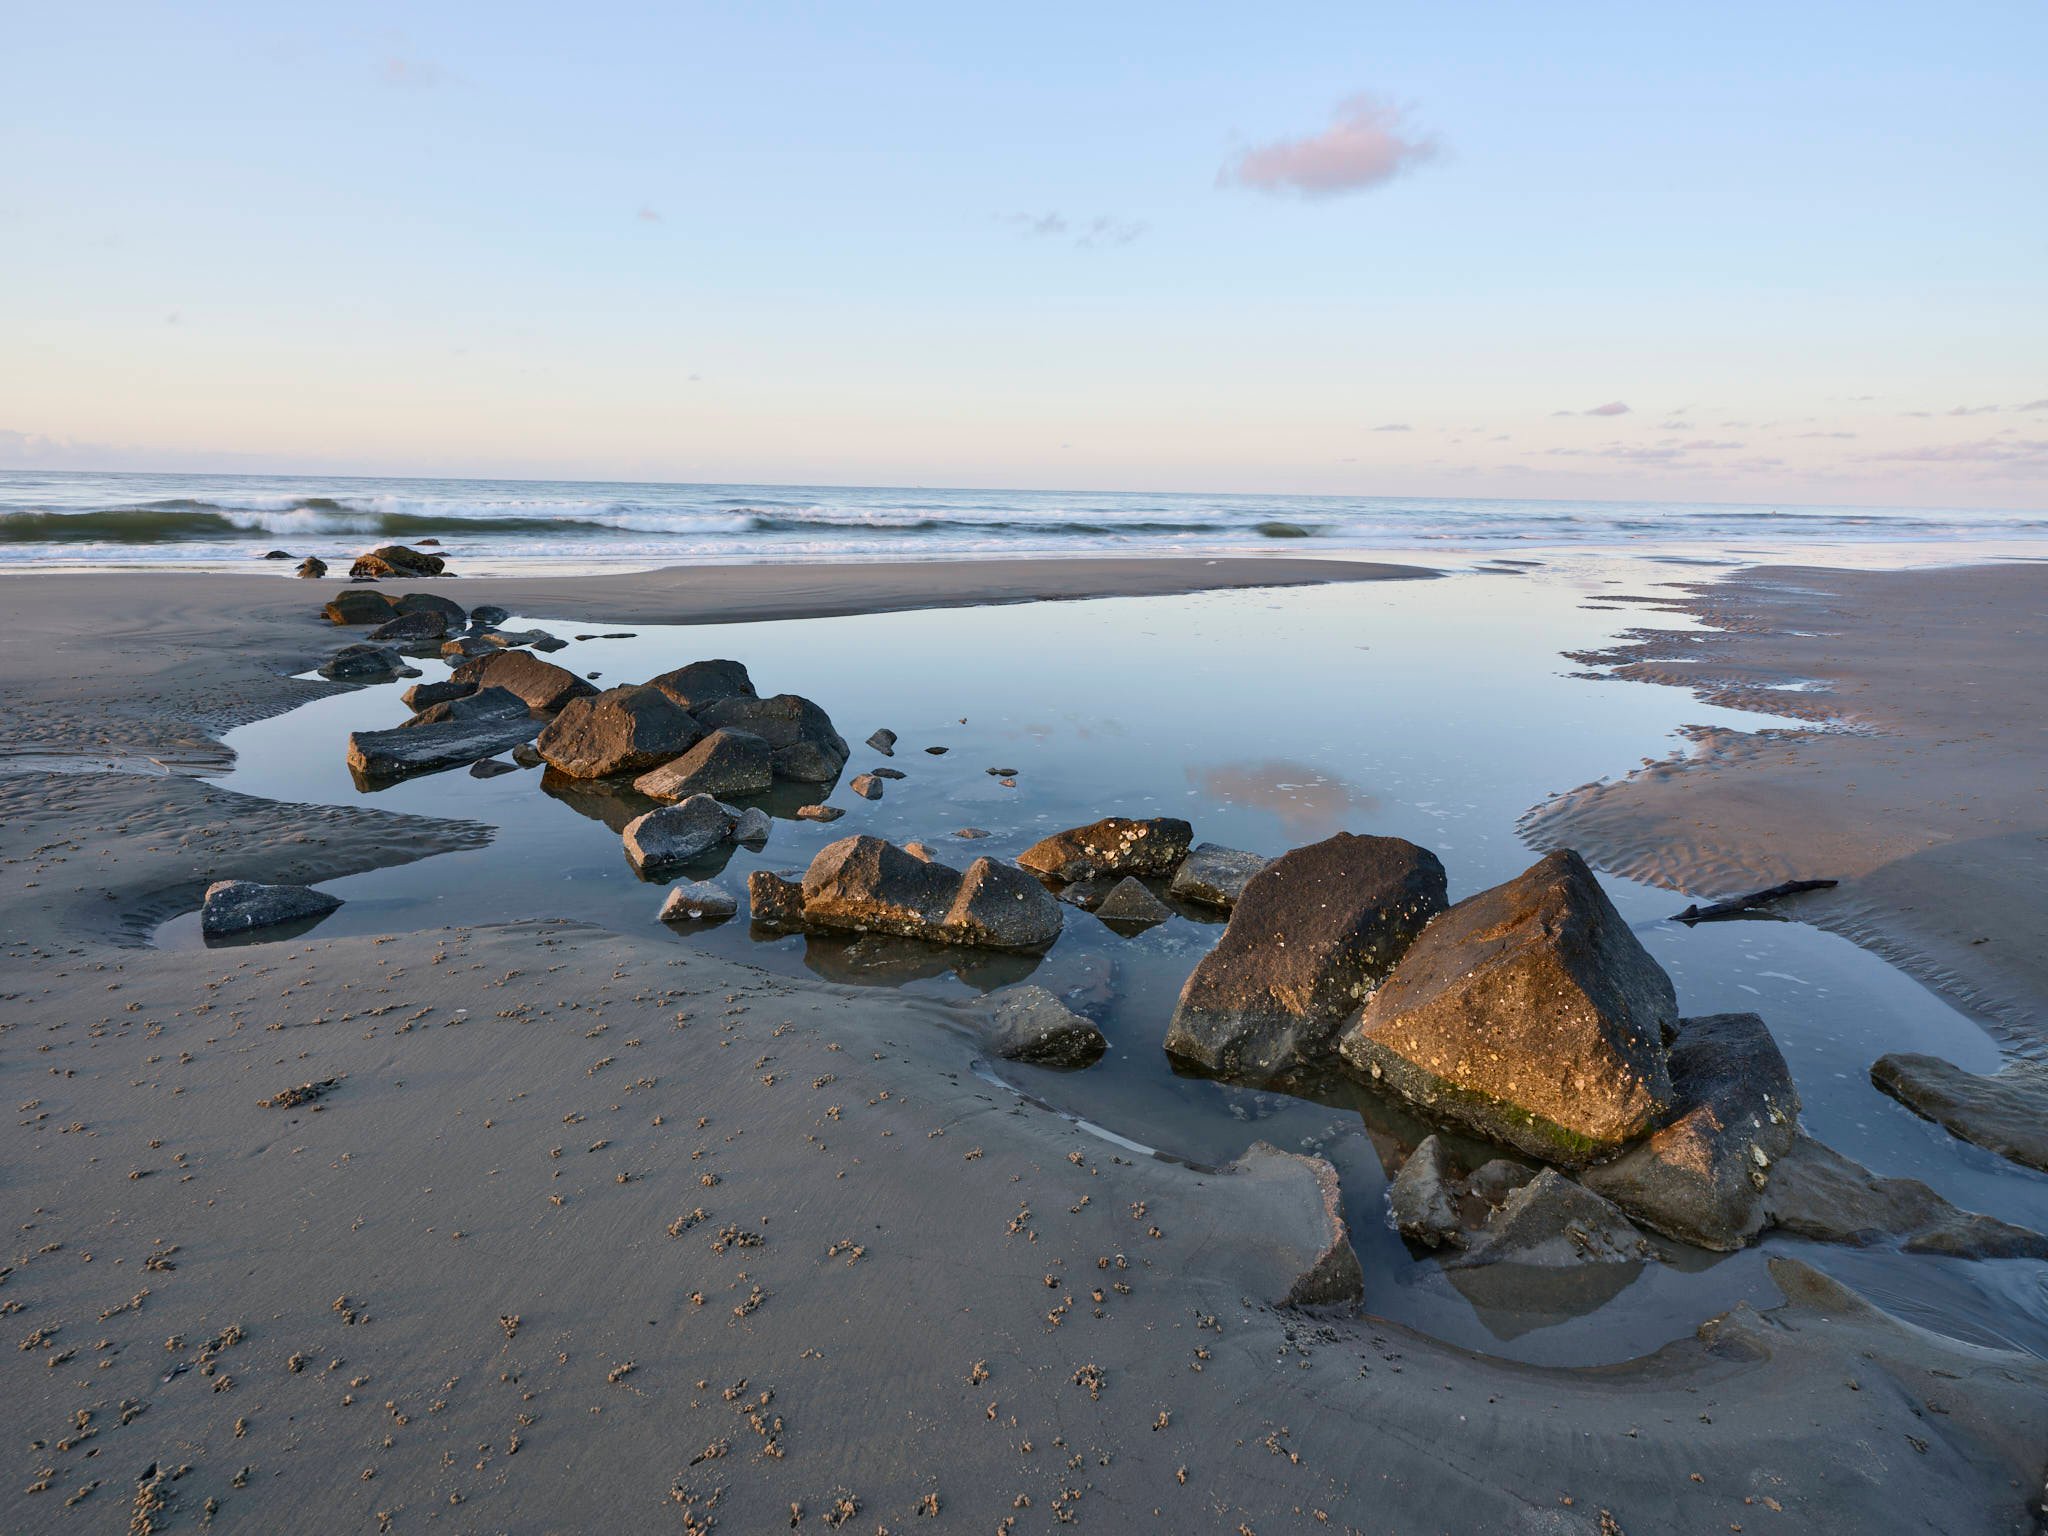
I wanted to figure out how to remove the purple that permeated the Capture One edits. I used a photograph I took the next morning with the 25v lens. This was my first serious outing with this lens, and it is wide! The tide had receded from the middle of the night, leaving some lower areas full of water around some very old rock groins. For an ultra-wide lens, this was a perfect setting.
My goal in editing this image was to remove the purple cast from the Capture One image to make it more like the color out of Phocus. One of the hardest areas to work with in digital photography is color and color starts with the white balance. It was here I found a major difference between software engines. Phocus incorporates the Hasselblad Natural Color Solution, or HNCS. Hasselblad developed their own color solution and calibrates every camera sensor before it leaves the factory. My sensor is calibrated differently than yours so that they both deliver the best 16-bit color that they can. This is an area Hasselblad excels.
The white balance from Phocus for this image read a Temperature of 5974 and Tint of 21. Hasselblad uses Tint ranging from -100 to 100 whereas Capture One uses Tint from -50 to 50. So, one would expect the Capture One Tint to be in the 10-11 range and the Temperature to be the same. But they are not! The Capture One white balance read Temperature (Kelvin) of 5935 and Tint of 5.7. These are shown below and both are ‘As Shot’ or out of the camera.
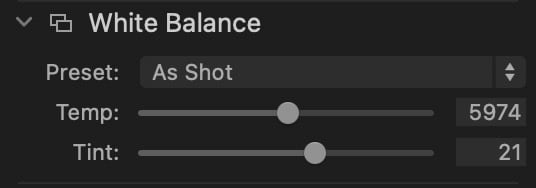
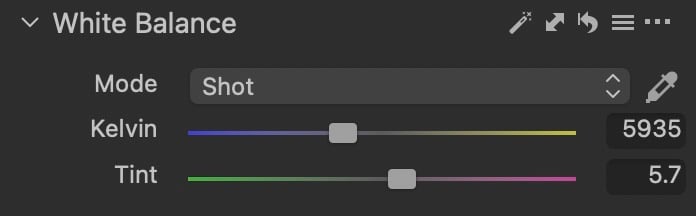
While I am sure Capture One will adjust their RAW processing over time, for now there seems to be a difference in the white balance output between Capture One and Phocus. The fix is simple. Adjust the Temperature (Kelvin) slider in Capture One to make it less purple and more green. I prefer this to using the dropper as I never know how far from my starting point things might go. The images below include this edit on the Capture One export. The purple is far lessened and they are much closer in color renditions
Blues are Not Always Blues
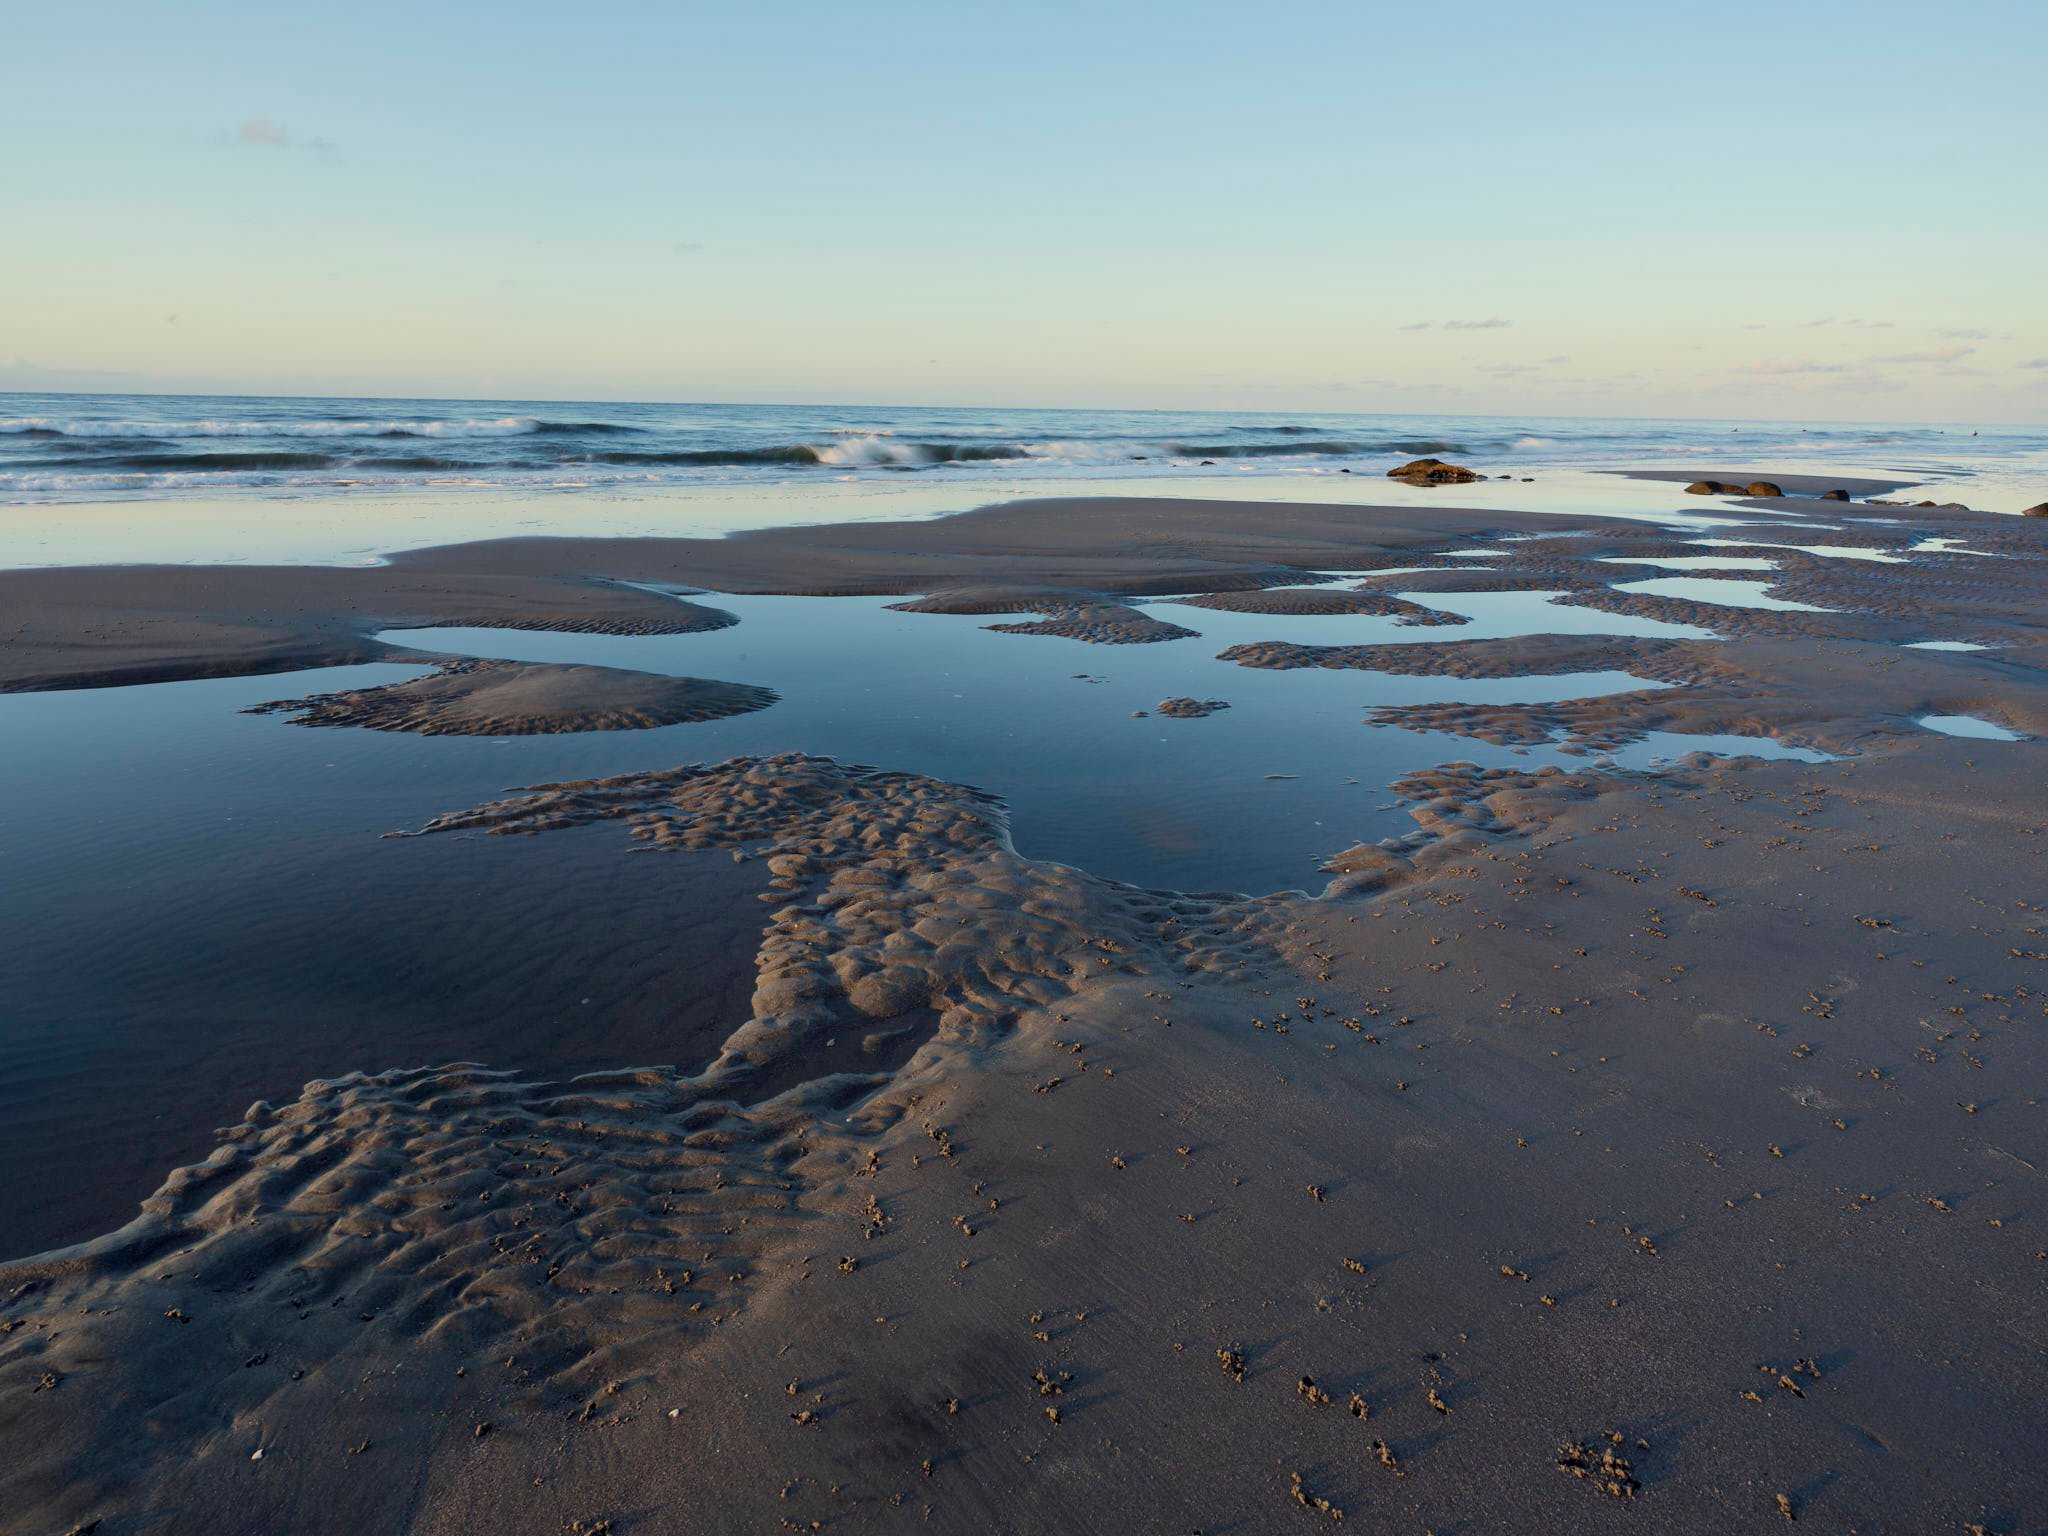
This image was shot the morning after the ones above and I still had the 25v attached. To sum up the edits, the X2D ii system does a fantastic job of capturing bright blue skies and retaining the information. Editing bright skies is altogether different. The Phocus image held the brightness as I adjusted the luminosity curve and the recovery slider, but it also held the shade of blue in the sky.
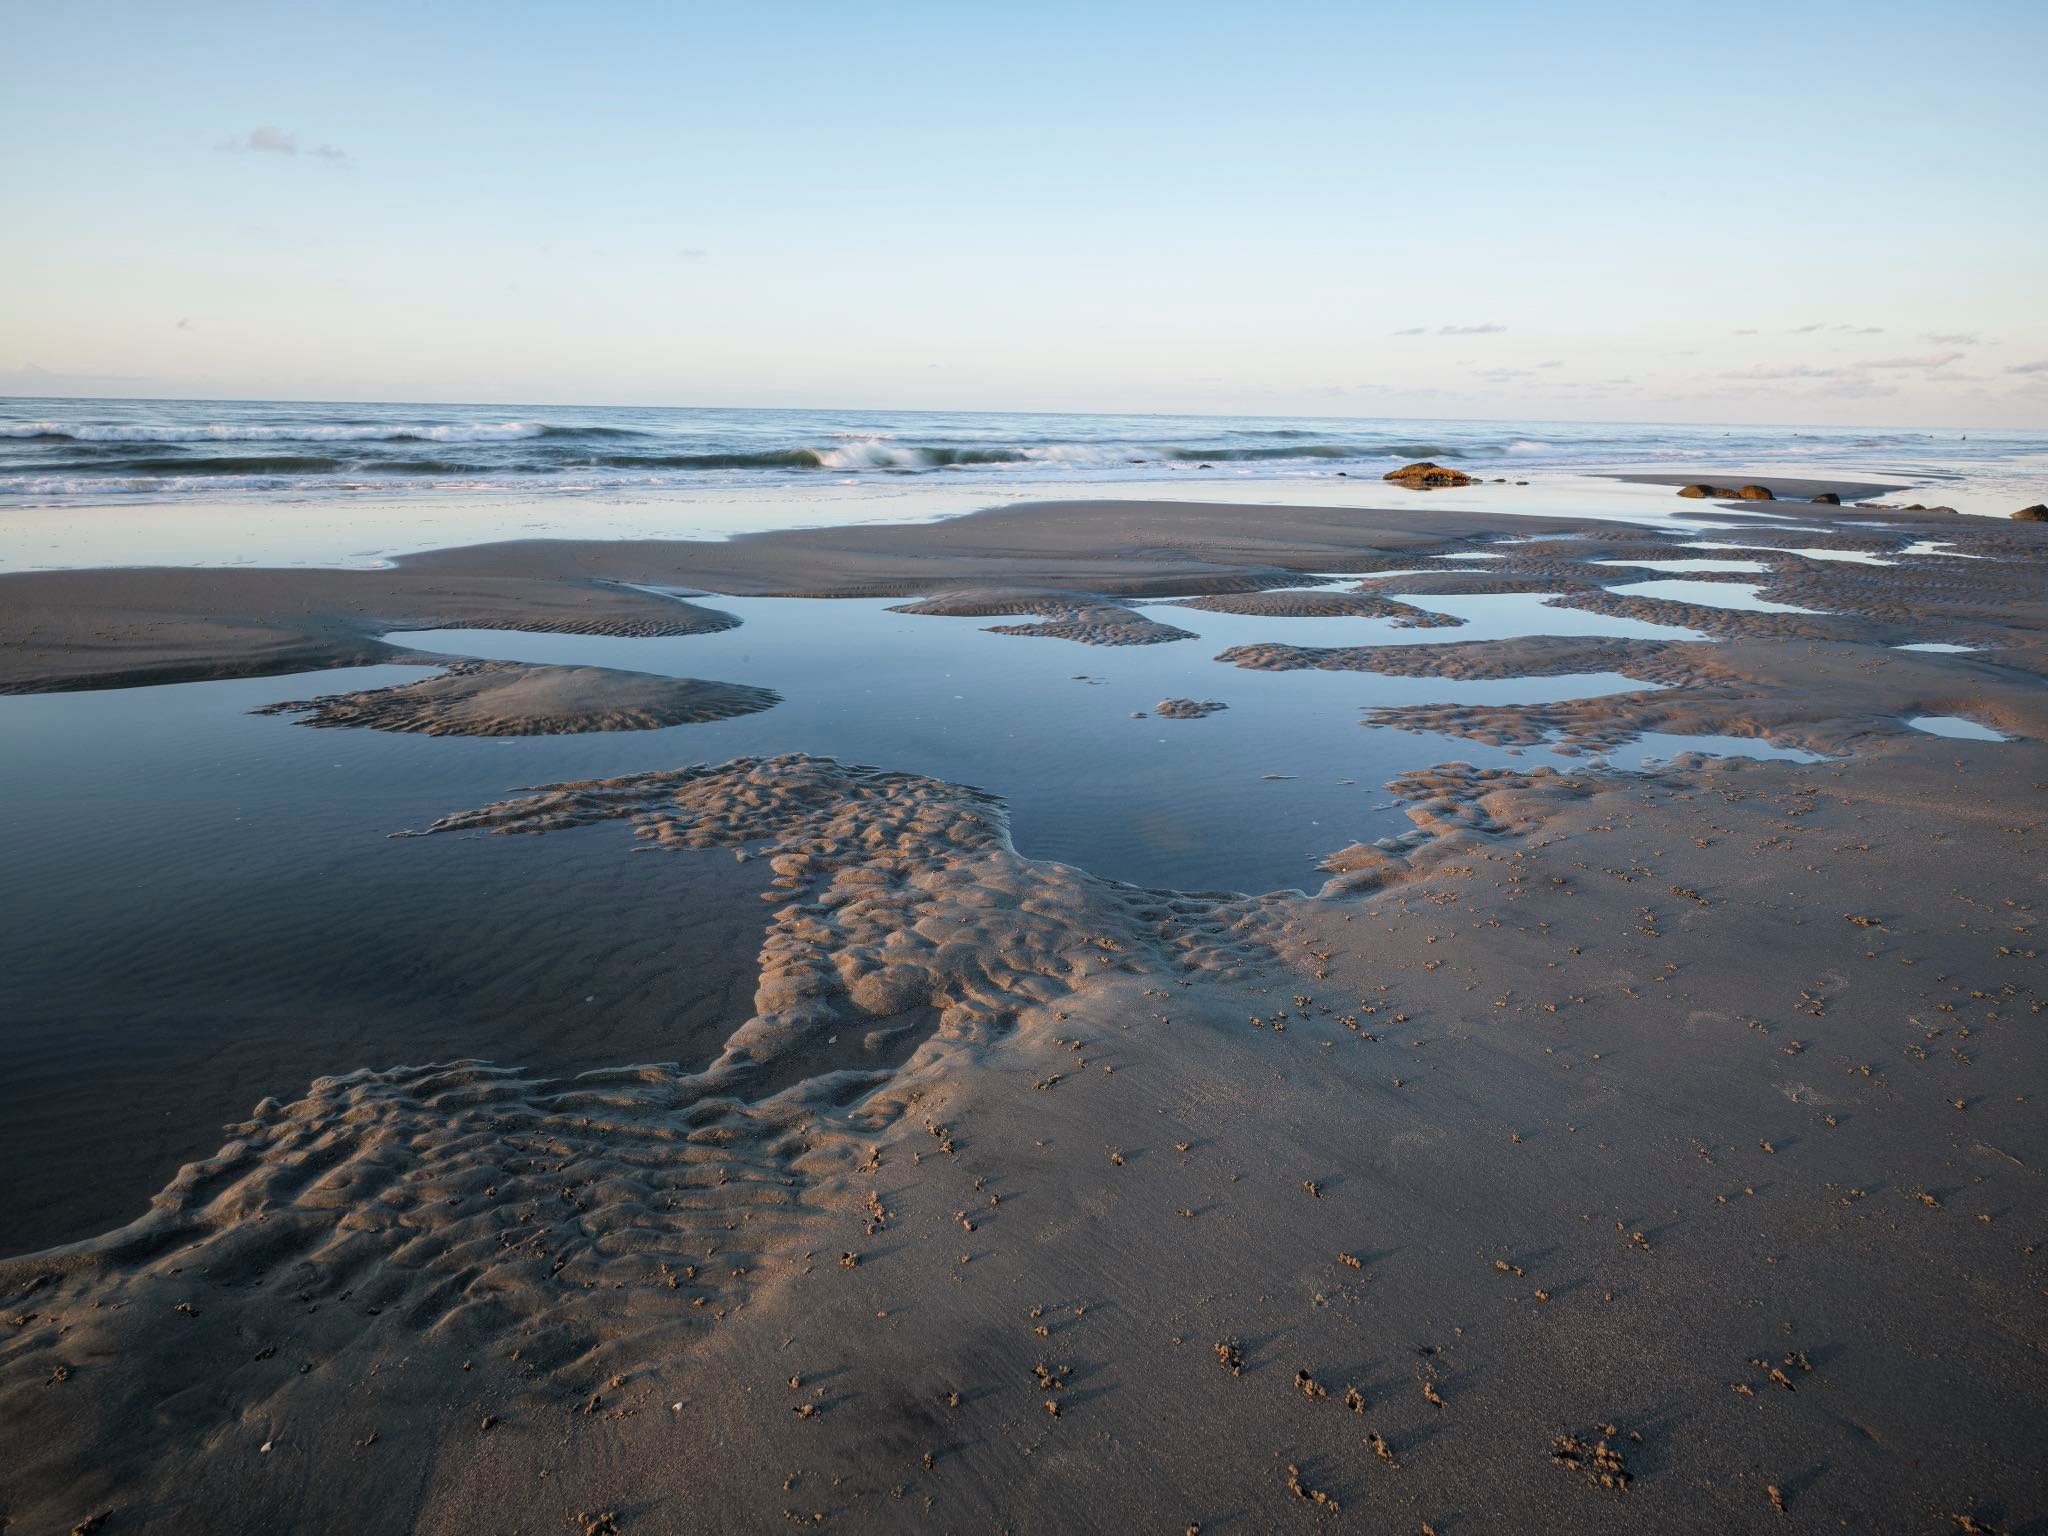
However, when I reduced the highlights and lowered the luminosity curve in Capture One the sky took on a more teal color and the blue hue changed. Without the edits, the sky was clearly outside the brightness range and the exposure warning glared. Getting the colors to perform the way you envision them is important.
High ISO, Shadow Recovery and In-Camera Crops
I took an older image that I shot to test a few things. First, I did not assign any crops in-camera to my July 1st and 2nd outings, and I wanted to know if Capture One would retain those crops. The good news is that Capture One did retain my 1:1 square crops on several older images where I set the camera to capture the RAW file with a square crop.

This image also was taken very early in the morning before the sun came up and the sand was dark. I wanted to raise the shadows and really accent the beachfront houses and reflected sky on the windows. To accomplish this, I raised the brightness and shadow sliders a lot, compensating with a little contrast. A few things happened.
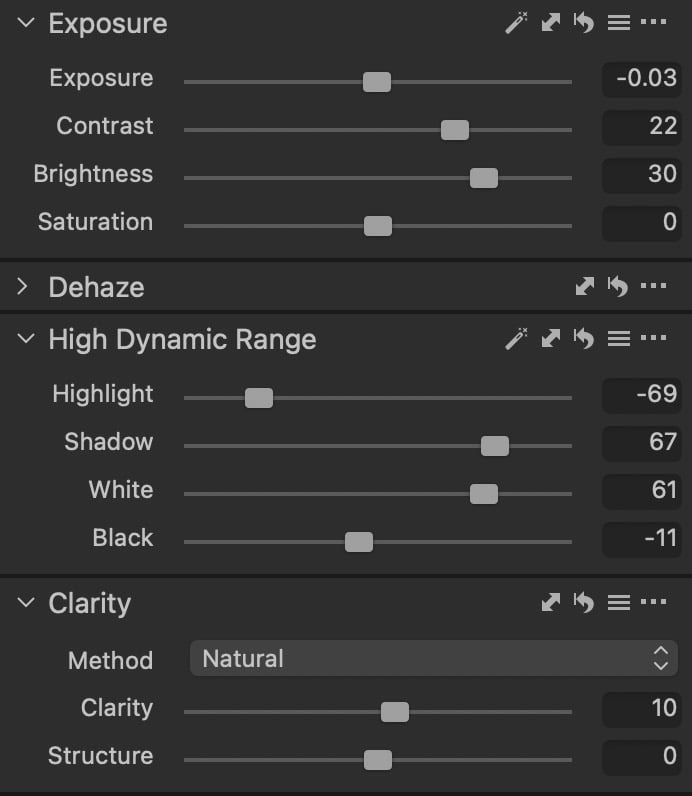
First, the shadows were very pliable and seemed to react well to the sliders in Capture One! However, upon closer inspection, I saw a large number of lit pixels in the shadows. I used the noise reduction, single pixel slider, cranking it up to 40 before they seemed to go away. Excited, I exported the image, only to find out that I could still see some of those blown pixels, albeit a lot less.

Using the Phocus app, I applied similar edits, using the boost shadows and brightness along with the luminosity curves to really bring up the shadows. Not only could I not see any bright pixels, but I did not have to remove any. The resulting export shows none of the bright pixels in the shadow area.

Conclusions: Pro’s & Con’s
I have used Capture One for long enough to know that they work hard in developing new products and that sometimes new features take a few revisions to get just right. I am sure this venture in supporting Hasselblad digital files is no different. In the same way, I do not see Phocus going anywhere anytime soon either. Let’s start with Capture One.
Capture One Results
Capture One has a much better import and catalog routine than Phocus. Exporting recipes both singularly and in groups is incredibly easy, and results are predictable. Keeping .3FR files alongside my .DNG files is very efficient. More importantly, the healing brushes in Capture One and spot removal tools are generations ahead of Phocus.
However, there are color differences between Capture One and Phocus. The weak point in Capture One is the color rendition and adjustment. That does not mean the purple cannot be removed or that other hues may not be adjusted. In fact, I adjusted a few images I did not show here using the Color Balance tool and was very happy with the results. The automatic adjustment of the camera and lens profiles is well done, and the diffraction correction when I used f/20 for some images worked very well in keeping some native sharpness in the images.
The one area that is not easily fixed is boosting shadows a tremendous amount. If high ISO is used and / or shadows are deep and must be made much brighter, I would definitely edit in Phocus for that image.
Phocus Results
Phocus continues to increase in abilities and development of the HiDef images alongside better and better color science. Phocus provides a great tool for editing and exporting 100 megapixel Hasselblad images. The auto white balance is intelligent and almost always provides what I see when I captured the image. The Phocus 2 for Mobile is a great compact, travel, editing system.
However, Phocus still lacks great spot removal. Until the cameras shake the dust loose or simply do not attract as much dust, I will need to take an edited image to a third-party program to remove the dust and dirt. I have used On1 Photo RAW for this final process and to increase dynamic contrast, and now have a second easy choice.
Phocus also has an image organization process that is reminiscent of Photoshop Bridge. Improving the import process could be made much easier and add more to the editing experience.
Choosing?
If cataloging and ease of import to use Hasselblad images next to other camera images is important, Capture One will fit the bill. You may spend more time color editing and fixing some hues, but the workflow gains might be worthwhile. If color results are most important, then Phocus is still the clear choice. Phocus was made by Hasselblad to edit Hasselblad files, and it excels in that arena.
I may try a hybrid and use Capture One while taking my absolute best images into Phocus for an archival export using Capture One to cull the images and keep them with my other cataloged images. Time will tell!